CodeWilster
Third Instar
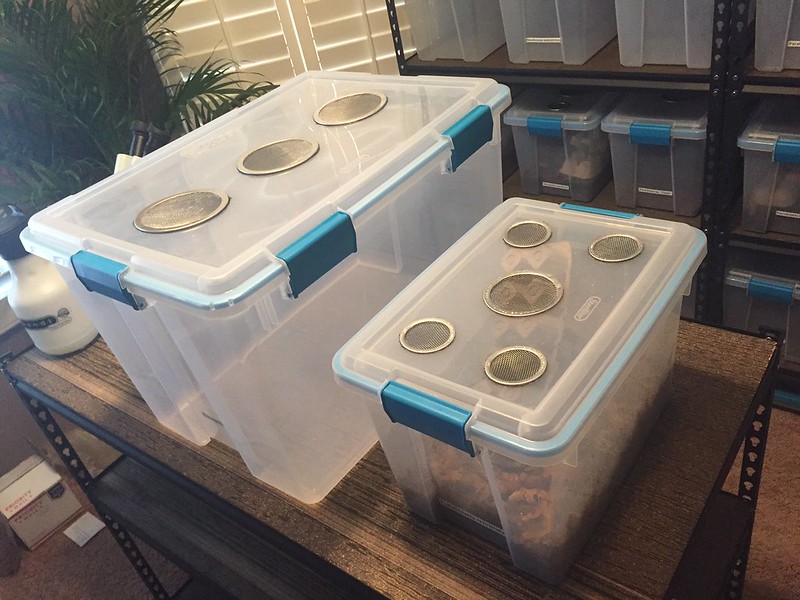
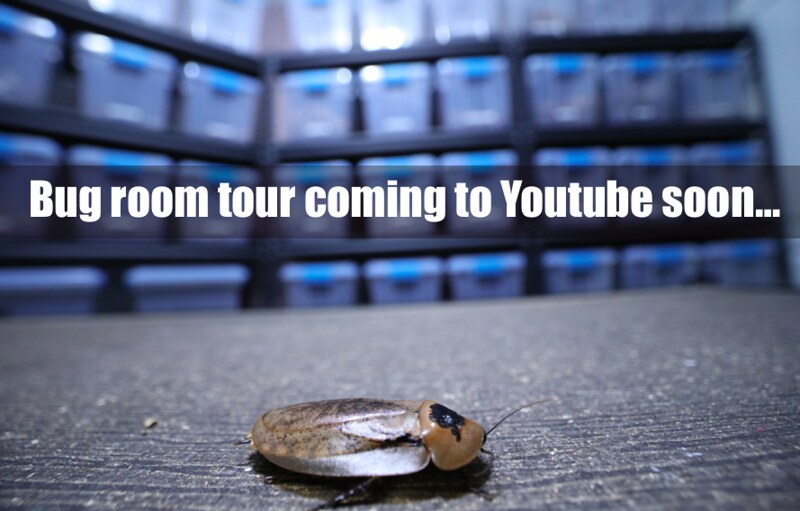
Hey guys, it's been a long time since I've posted anything (or have been involved in the invert hobby for that matter). Long story short I'm back into it as of a few months ago but that info will be for another post. After posting the above photo of my bug tubs on Facebook the other day, I had some people want to see how I made them. Because I had more to make, I figured I'd photograph the whole process and post it here. Of course, there's a million ways to make practical and effective colony enclosures. This is simply what I do for mine. They work fantastic for just about all species (including pests). For all of you DIY out there, hopefully this inspires you. It's a very simple job but does require some tools you'll need to pick up or borrow.
What you'll need...
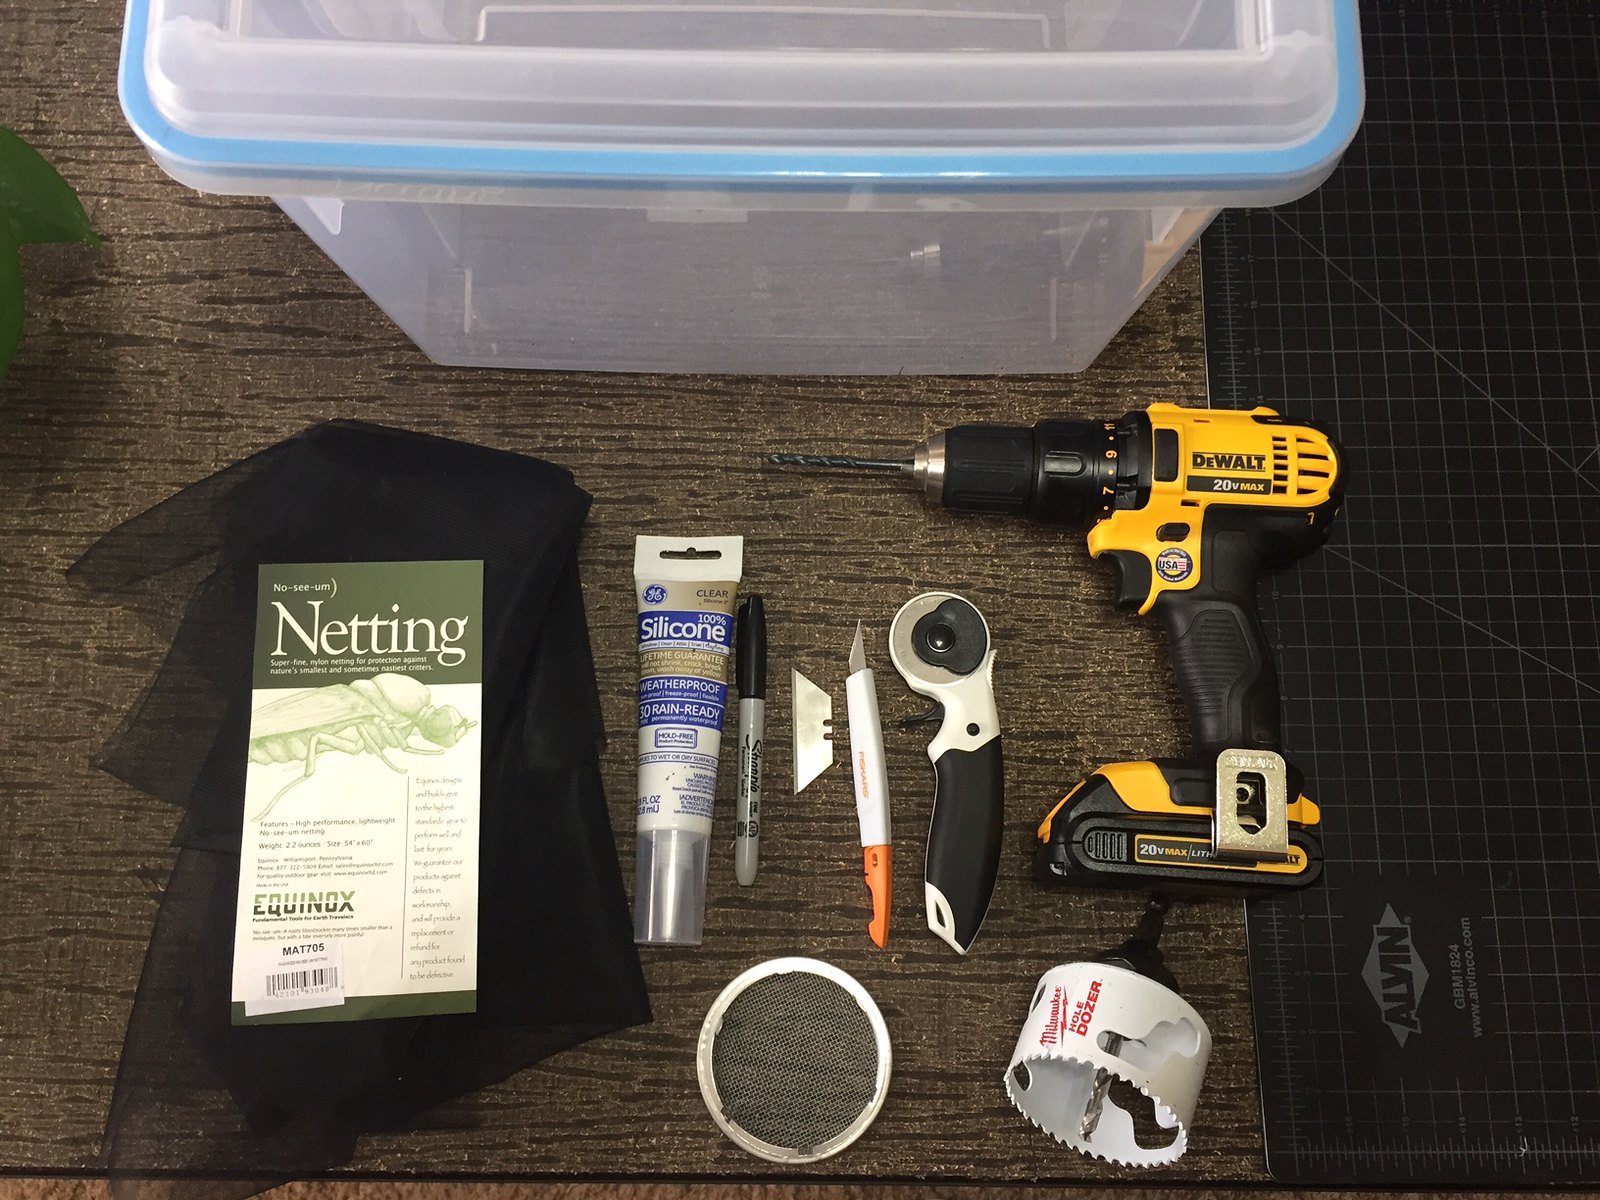
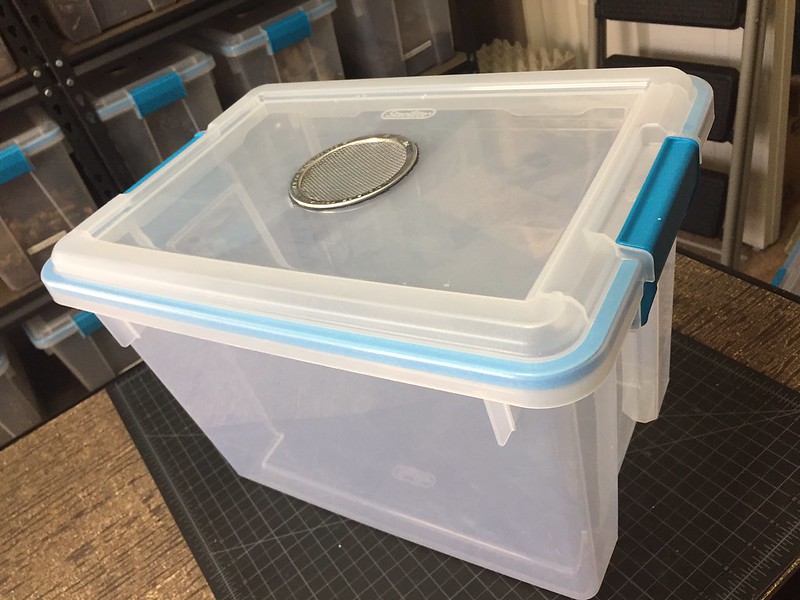
The tubs can be purchased at Target - this particular size runs for about $7. There's a few other matching larger sizes available. They have a blue gasket around the sides which keeps roaches from sneaking out. Besides the tubs you'll also need a drill, hole saw (same size as vents, the one above is 3"), clear silicone sealant, various razor blades, cutting surface, no-see-um netting or mesh of similar type, and the vents.
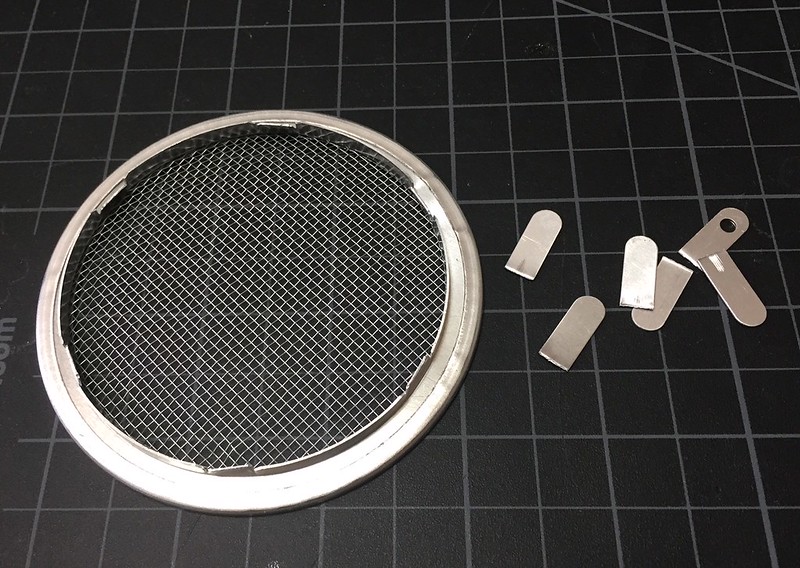
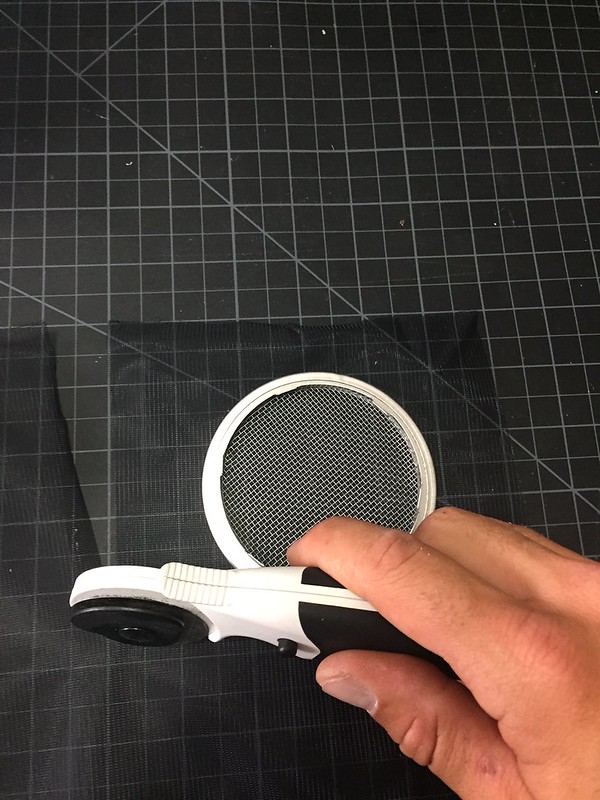
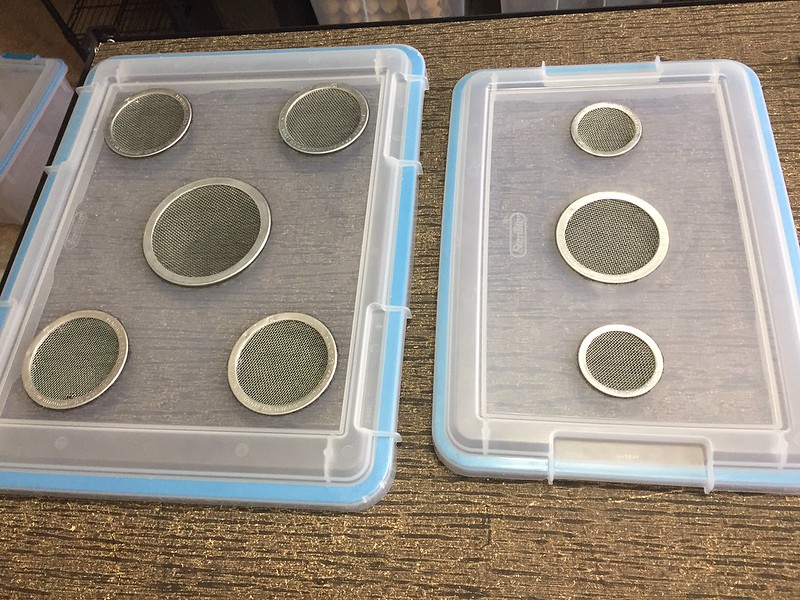
The vents come from THIS website. The ones I use are the "open screen tab style" (in mill) - they come in all different sizes. I primarily use the 2", 3", and 4" sizes.
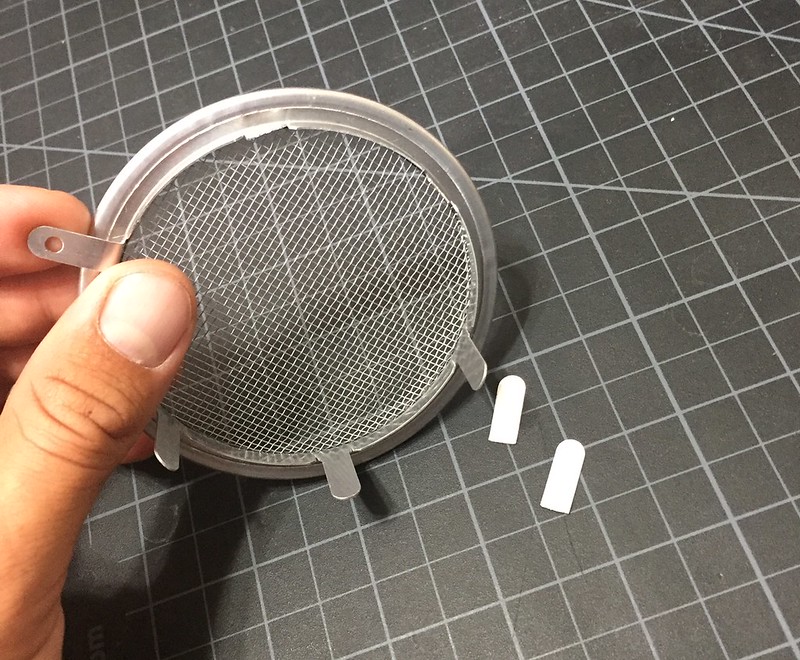
The vents come with these tabs. You certainly could use them like this, but the tubs I'm making I wanted to be able to keep fungus gnats from freely entering/exiting the tub, and to also keep the tiniest of roach nymphs in. Because the vents aren't fine enough for that, they need to be reinforced with no-see-um netting. In order to break off the tabs, just bend them back and forth several times until they pop off cleanly.
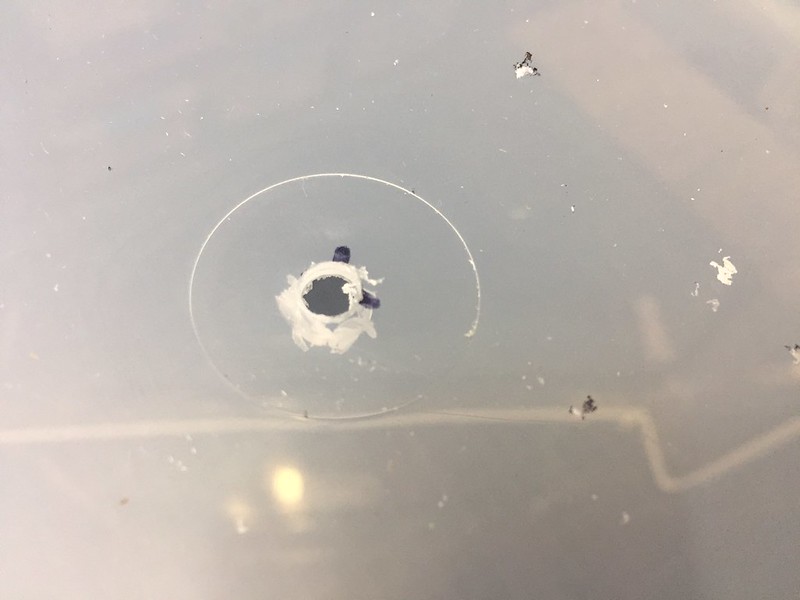
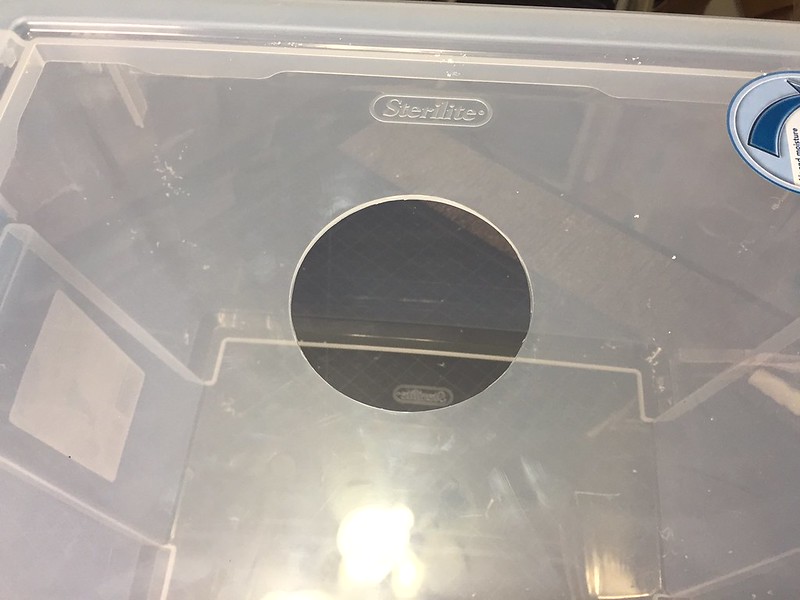
Mark your center on the tub lid where you'll be using the hole saw, and then pre drill a hole using a bit that is just a tad smaller than the hole-saw attachment's bit. If you're going dead center in the lid, there's already a mark there actually. Use a high speed setting on the drill so it drills/melts without much pressure.
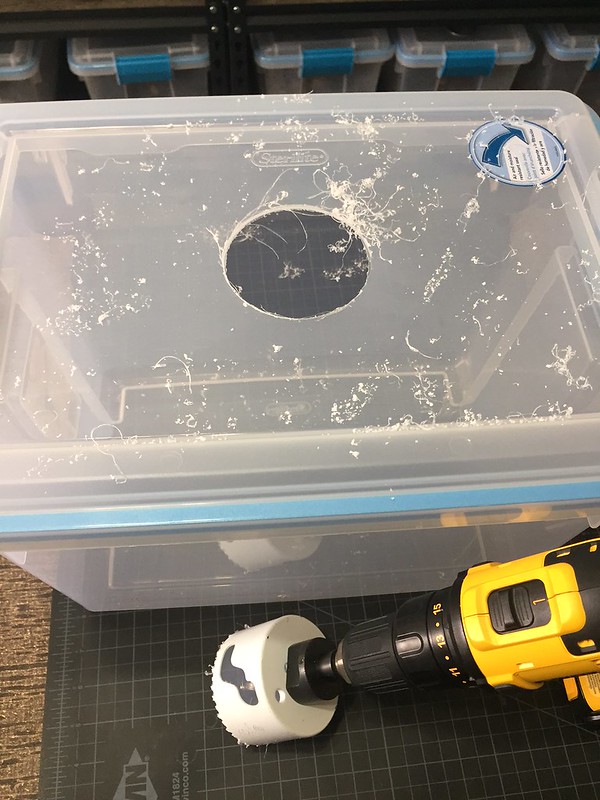
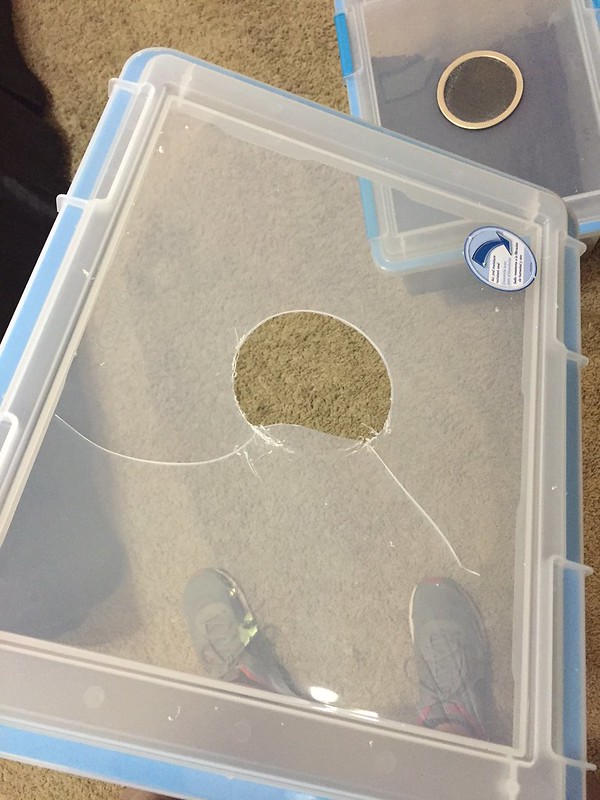
Next, drill the 3" hole using a 3" hole saw. Best way to do this is with the lid on the actual tub and the sides latched to keep it in place, and then hold the tub itself in place while drilling. I recommend a slower setting on the drill for this. Try to drill directly downward and start slow, then increase speed gradually as you feel it smoothly cut. You want to apply even, slight pressure. Push too hard and the lid will crack. I've done about 80 of these containers and have only broken ONE. It was one of the first ones though, and that's when I learned what the lids can/cannot take. As you can see, this is obviously pretty messy and is best done in a garage.
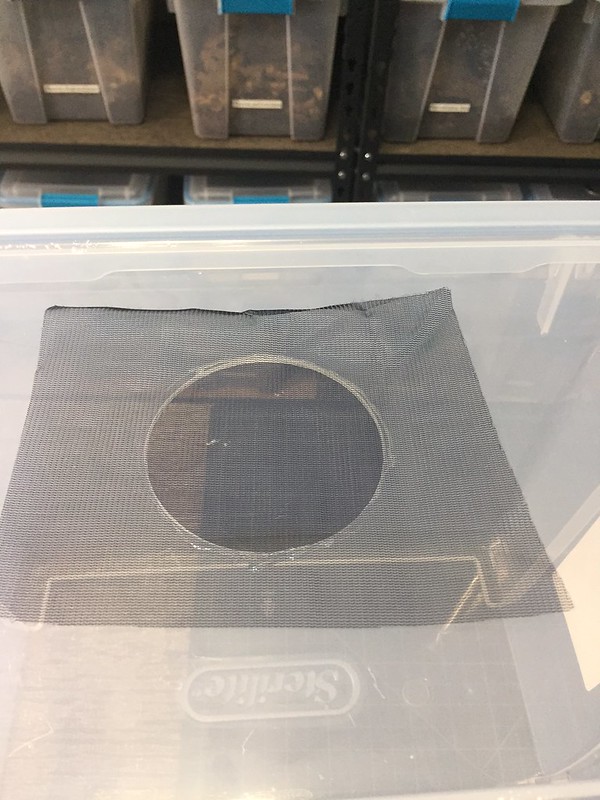
After cutting the hole, pull off all of the excess plastic strips by hand. Then, using a razor blade (ideally the type pictured) very carefully smooth out any rough edges and excess plastic that could get in the way of the vent rim.
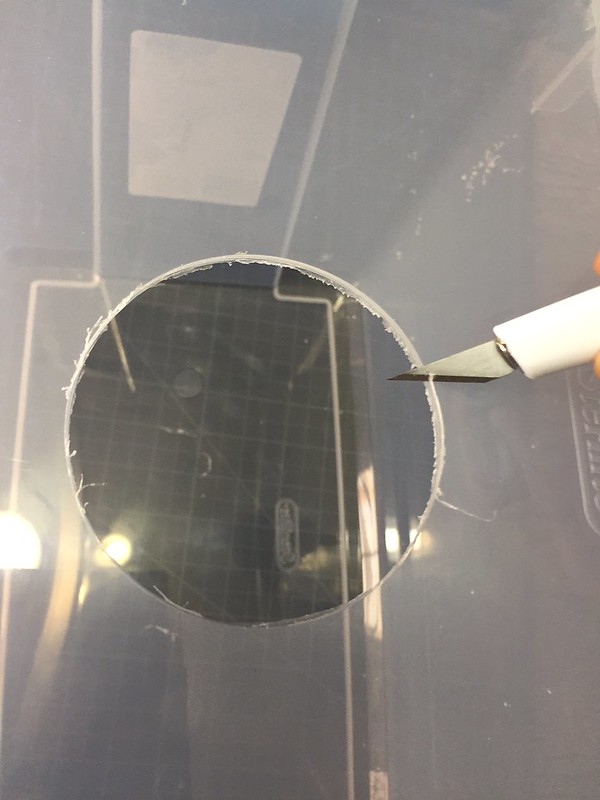
You should end up with a nice clean hole like this that is ready for the vent.
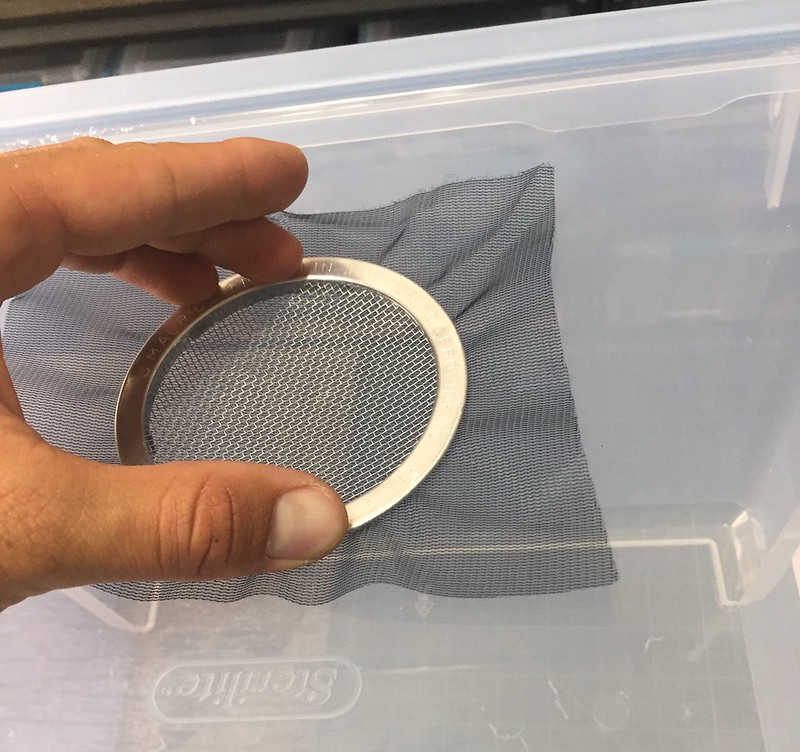
Next, you'll want to cut a piece of no-see-um netting to reinforce the vents with. I got the netting off of Amazon for about $10. This was for a pretty big sheet that lasted for a good 50 or so vents of various sizes 4" and under. It's fine enough to keep those pesky fungus gnats from flying in and out (the gaskets on the tubs also prevent this) and therefore creates a pretty much "gnat-resistant" container. Additionally, you can keep Blattella species this way and not have to worry about nymphs escaping while the lid is on. As for cutting, place the netting on a cut-safe surface and using the vent as a reference, liberally cut a piece of netting that's about an inch larger than the vent on all ends using a razor blade. You'll see why to be liberal with the excess mesh in a second...
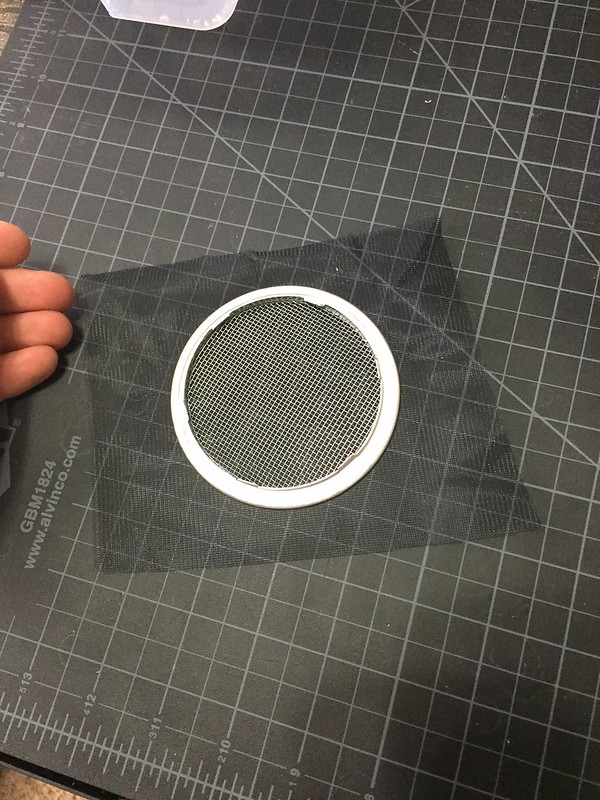
Next, add a very thin line of silicone around the rim of the hole. I chose to use silicone but don't see why you couldn't use a hot glue gun for this project. Afterwards, gently lay the sheet of no-see-um netting over the top of it.
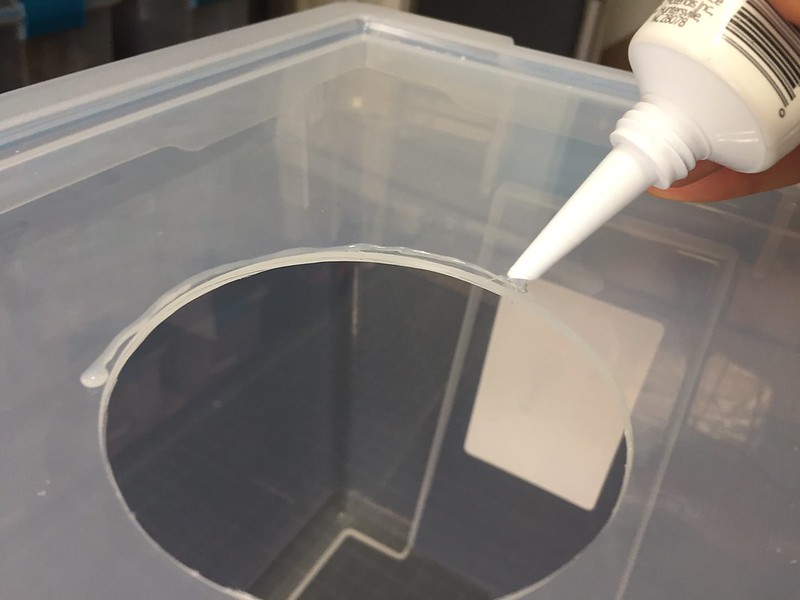
Next, add a layer of silicone around the inner rim of the vent. I wouldn't use more than pictured here as it will gush out the sides when you put it on and silicone is a pain to wipe away. Obviously too little doesn't do the job either, so try to match the amount pictured here.
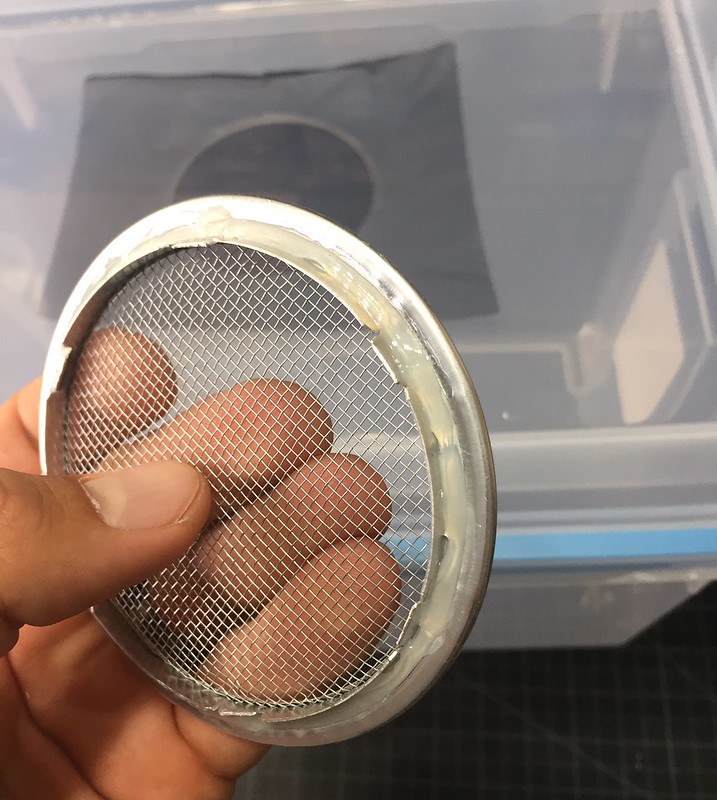
With the mesh relatively tight (pull a couple ends) go ahead and insert the vent right into the hole. It should fit perfectly. You can swivel it side to side a bit to even the spread of the glue underneath.
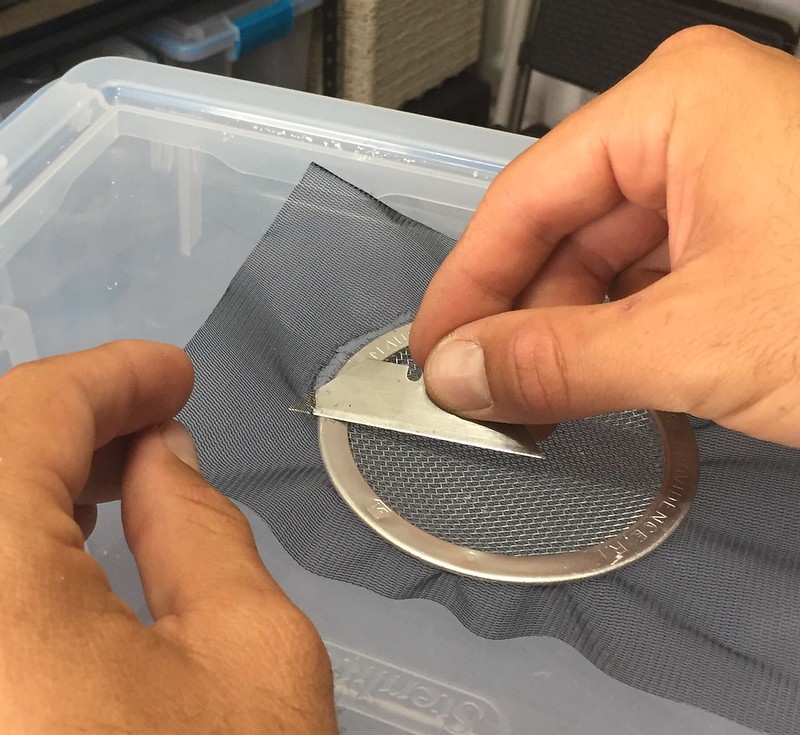
Using a very sharp razor blade, now you can cut off the excess mesh. If there's not much excess it's difficult to do this and that is why I recommend cutting the screens liberally. If you have enough to grip with your fingers around the sides, you can cut it nice and cleanly. As you can sort of see in the photo, you'll want to pull the screen so there's slight tension for cutting, and then cut it while simultaneously putting pressure directly down onto the vent (with both your other fingers and the blade itself). This will keep it in place while cutting. Once you've cut off the excess mesh you'll want to double check the vent is sitting level.
Because silicone takes quite a while to dry, you'll want to let it sit overnight at least. The hole saw itself makes a good weight that you can leave on the vent to help it dry correctly.

And that's it! Now you've got a good-looking, gnat resistant, escapee resistant invert tub. Of course this was just a how to for installing the vents. You can always get crazy and do more for those species that require more ventilation.
I hope this was helpful. If you have any questions, please do not hesitate to ask. By the way, leave the stickers on the tubs and save your receipts until you're done. That ONE tub I broke (below) I was actually somehow able to take it back to Target and exchange for another one
")


")